Welcome to my 2019-2020 classroom reveal! This year I made a few changes from last year. If you want to see the “before” click here to see last year’s grand reveal. All of the changes that were made were centered around student choice while making my classroom more organized and functional for myself and my students. Here we go!
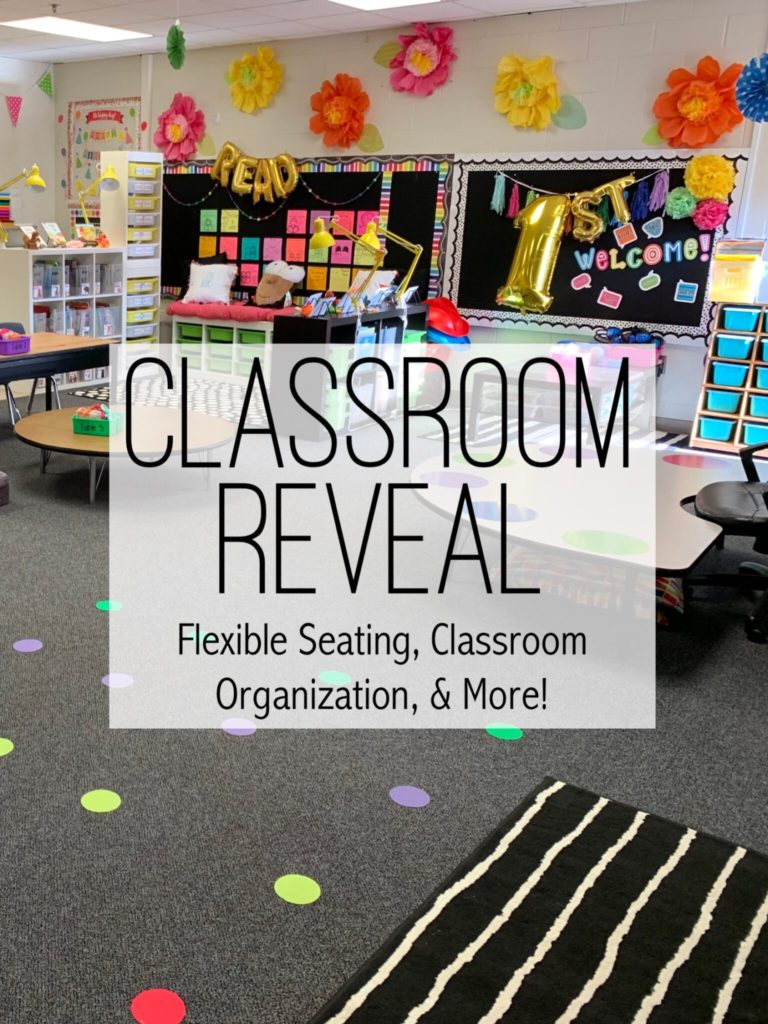
Classroom Set Up
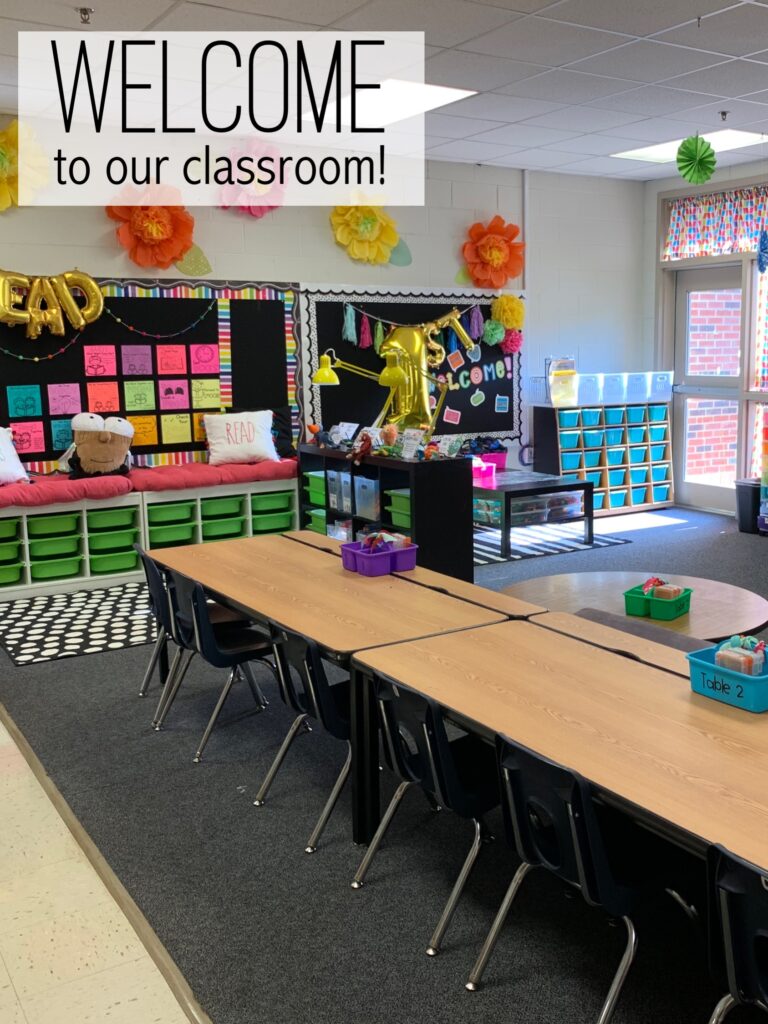
I slowly began introducing flexible seating last year. I wasn’t sure if I could manage and handle the changes so I phased everything in slowly! I’m so glad I did this. If you want to read more about this transformation, click here! I do still have a row of tables and regular chairs, but I lowered tables to the floor and added a futon to allow for more student choice.
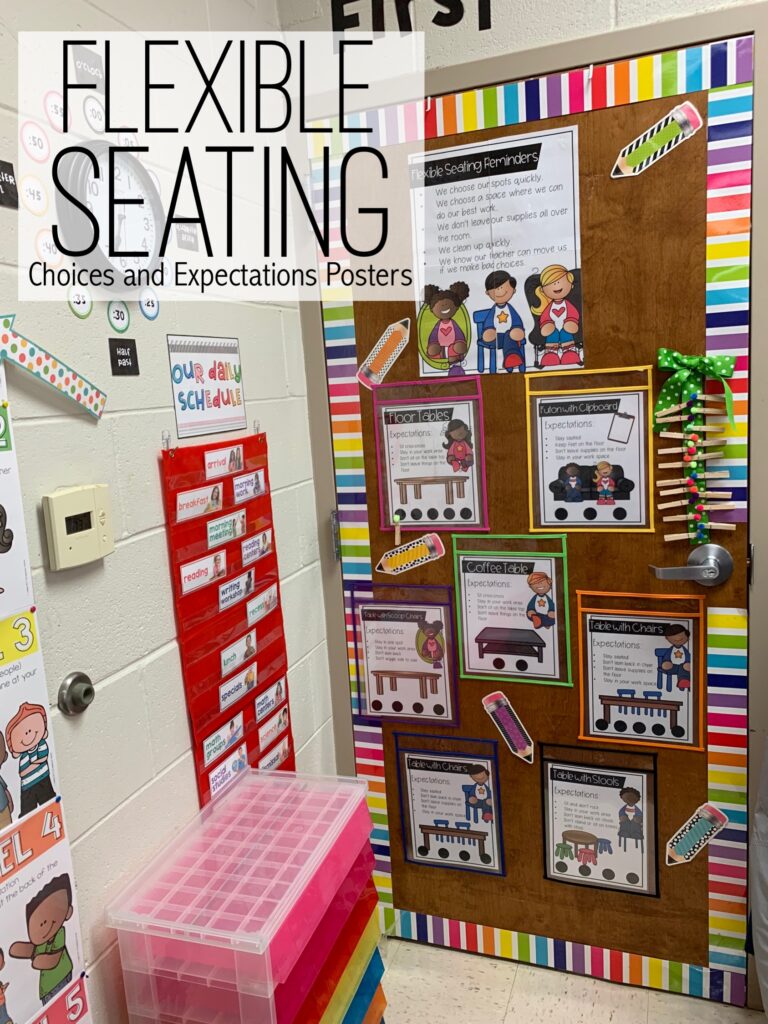
To manage seating arrangements and expectations, I made these posters for my classroom. Each student will have a clothes pin with their name on it. They will select their spot for the WEEK. I am not doing daily choice selections until after Christmas. This is a personal choice on how I manage my classroom. I hot glued the top of the clear pouches so clips can work on the bottoms. I used pouches so that if I change my seating options, I can just swap out the pages. Click here to see more about these posters. They are customizable so you can make them reflect the options you have in your classroom.
Classroom Library
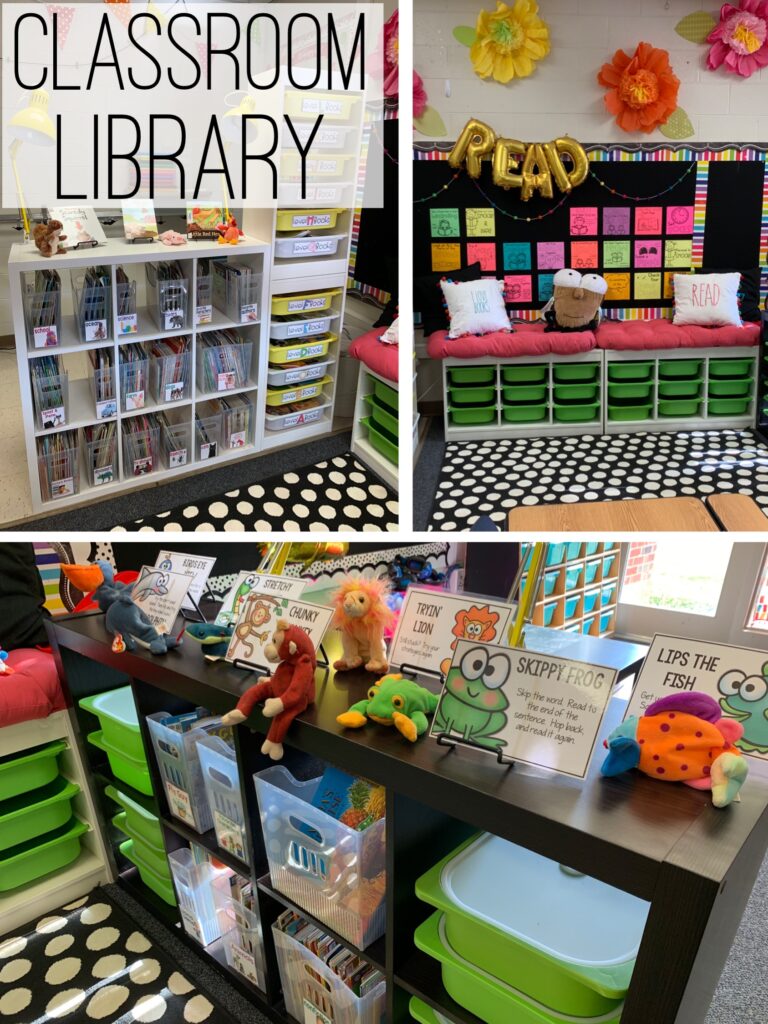
My classroom library is certainly the most expensive area in my classroom and the one area that I feel most passionate about. As a parent of a child that really struggled to learn to read, I wanted to design a library that provided a multitude of book choices by theme, genre, and level, but also provided an area where students can look around them and be reminded of their strategies they are learning so they can attack and read difficult words. Let me show you more…
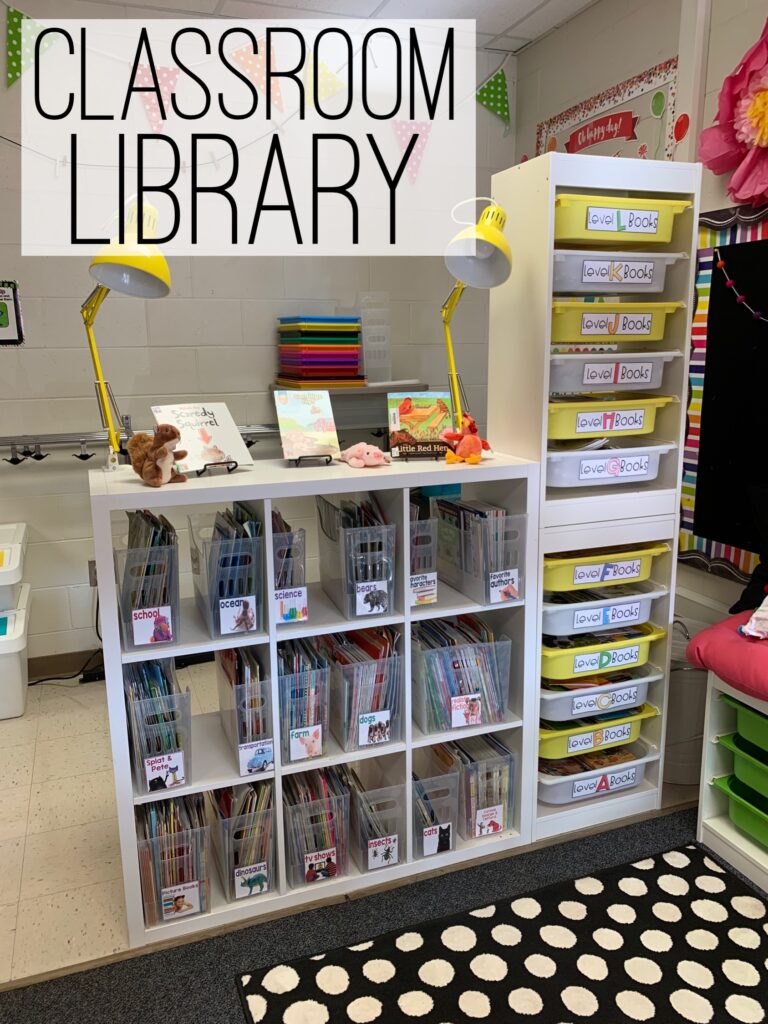
My clear book bins are from The Container Store. They are multipurpose bins and come in a variety of sizes. I also use the Trofast Ikea storage drawer sets to hold leveled books. All of the books in my library have two stickers. One has the level and the other has the theme. If I can’t find the level, they just have theme stickers. Why? I believe that if a student is motivated enough by high interest, the book level doesn’t matter. They will find a way to read the book! A student last year who was on a level C had a level O solar system book. He kept it in his book basket the whole year. I didn’t argue with him. I let him keep it. By the end of the year, he could read the WHOLE DARN book!!! I listened to him so he wasn’t faking. He read it! I offer my students choices. They keep 8-15 books in their book baskets which is why it is important for them to have a MULTITUDE of book options available. If you want to learn ways to build your classroom library on a budget, click here to read a post of how I built up my library.
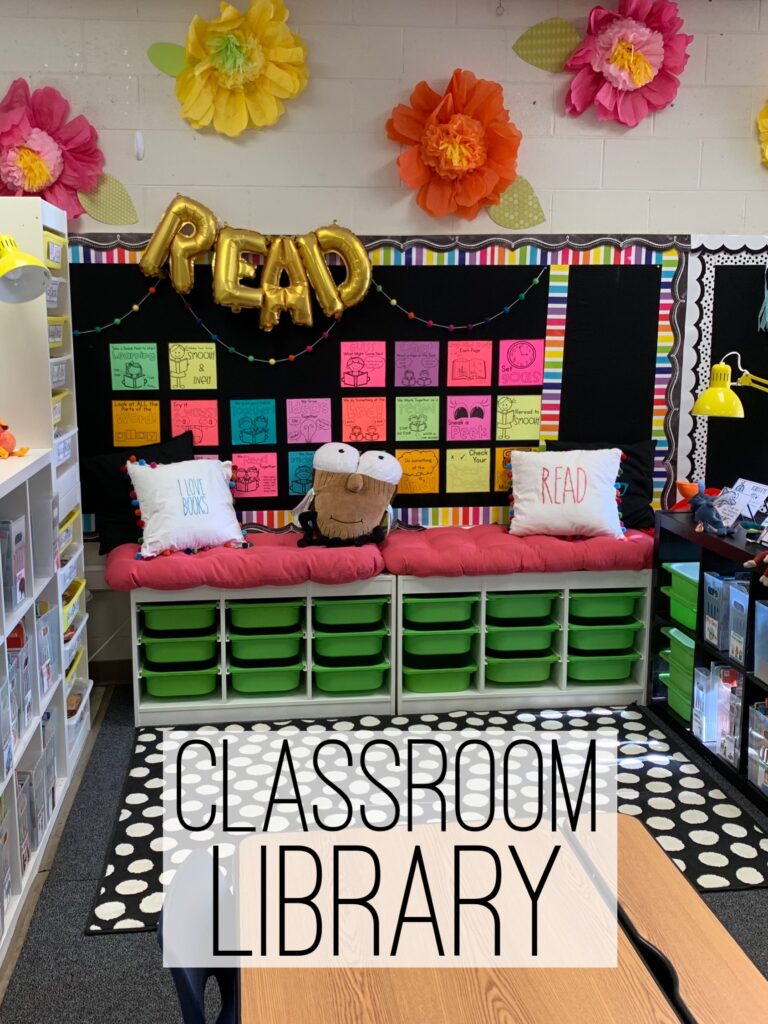
The bench with the green drawers stores our book baskets. Each student will be assigned one this year. We will swap books on Fridays or Mondays (depending on our schedule for the week). I want to point out the posters behind the bench though. Those colorful posters are the reading habits and strategies we learn throughout the year in readers workshop. Click here to see more about them.

We all know that not all students learn the same way. Different words or visual cues help different students. To help encourage readers to use good habits, I am also using “Strategy Buddies” this year. During small groups, I will introduce each buddy and their strategy for reading. These will be displayed in my reading center as a reminder and as students are working on different skills, they can use the buddy in their reading basket as I see necessary at my table. The green bins, once again, are the plastic baskets from the Trofast storage from IKEA. These just happen to have lids.
Listening Center
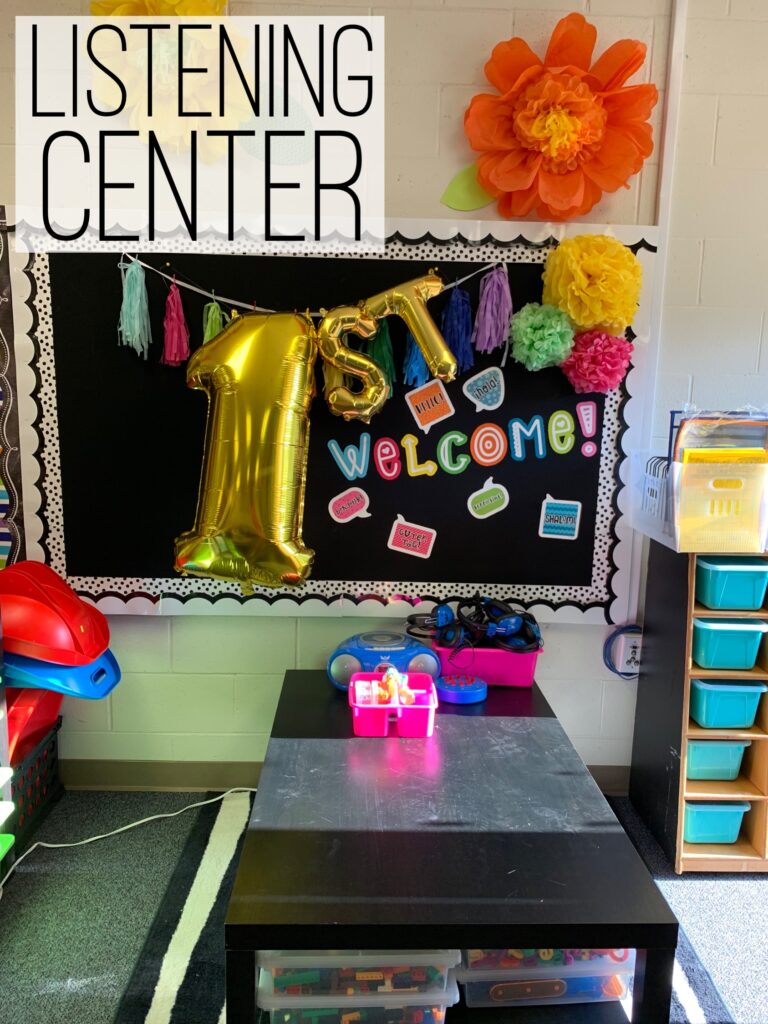
The listening center stayed the same. I just moved it closer to my small group table this year so I can better monitor student behavior. Some of the books they listen to are shorter so I need to make sure they are working and not playing. This is also a flexible seating option in my classroom.
Cubbies/Unpack Area
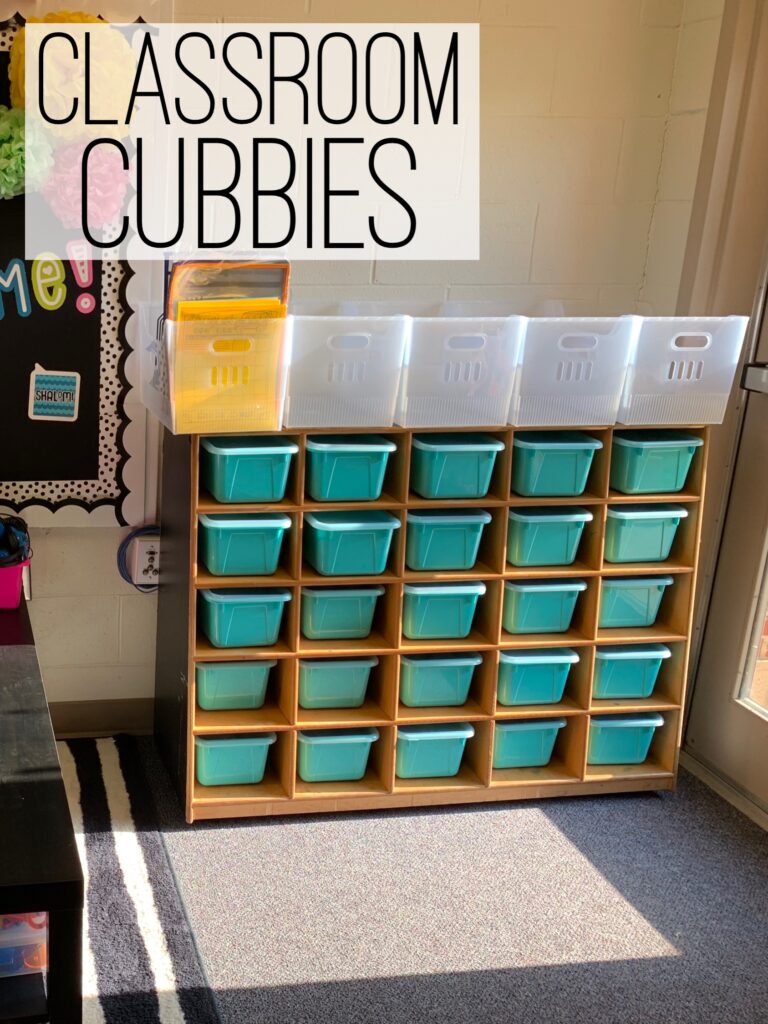
These cubbies are new this year. A friend of mine is moving from a classroom to a media specialist position. I bought these cubby boxes, that she found on Amazon, from her and added some extra large multipurpose bins on top. The bins on top will hold agenda notebooks. Students will be assigned which bin to drop their agendas in so everyone knows where they go. The cubbies will hold their Goal/Behavior Lanyards , PBIS tickets, and other small supplies.
Teacher Area
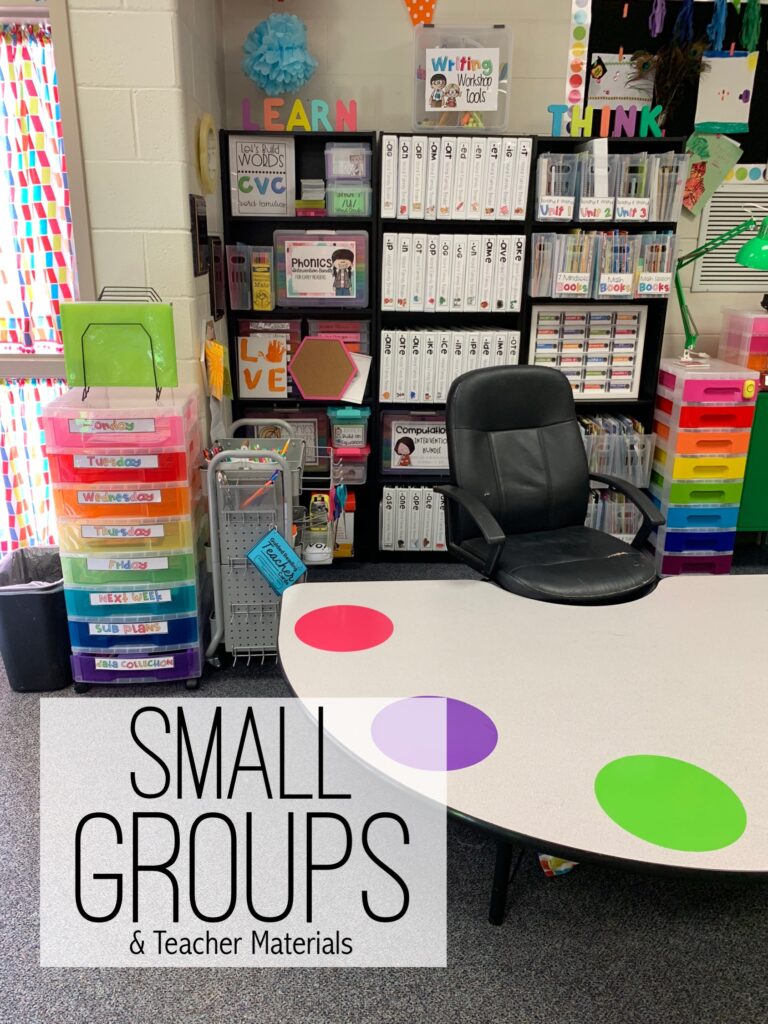
The biggest change to this area from last year is that I took off the legs to the small group table. I originally had stools here, but students kept rocking and bending the legs of the stools. What is up with kids not being able to sit in a chair or on a stool anymore? Well, I showed them! I just made them sit on the floor instead! This is how flexible seating began in my room. I also added vinyl circles on the tables where my students can write without us writing all over the table. It just sets limits so they know their area vs their neighbor’s. The drawers to the left hold all my copies for the week. These labels are a freebie in my VIP Resource Library. Are you a member? Click here to download. If you aren’t, you can click here to sign up.

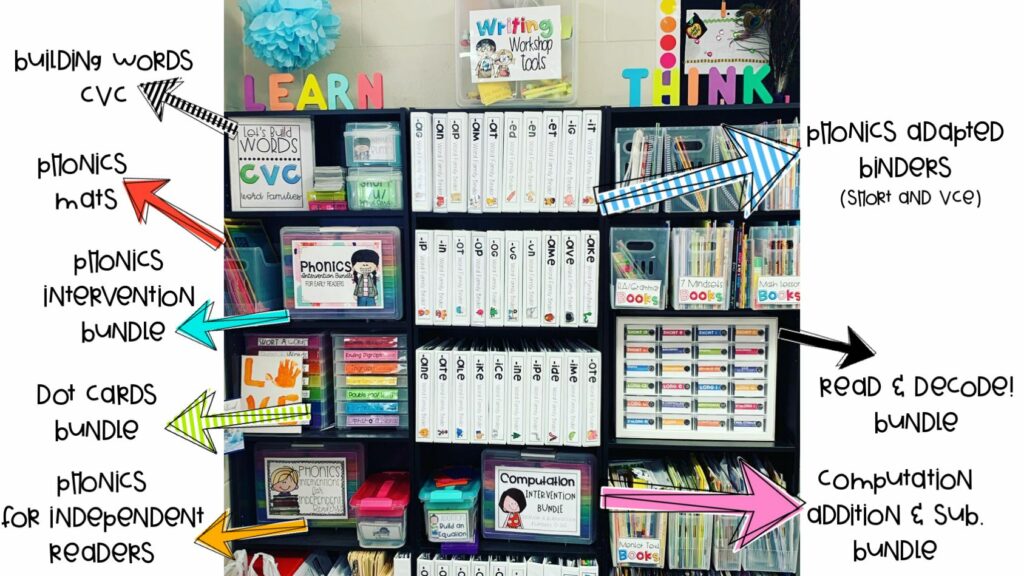
I also removed my teacher desk and computers from my room to open up the space and make it feel larger. The student computers took too much of my small group time to get up and running. We use iPads instead. My teacher table became a place where I just stacked stuff and made a mess. I’m teaching myself a lesson and just removed it as a punishment. I now keep my area much more tidy and put things back even if I am on a time crunch. No more clutter. All the materials on the black bookshelves are from my TPT shop.
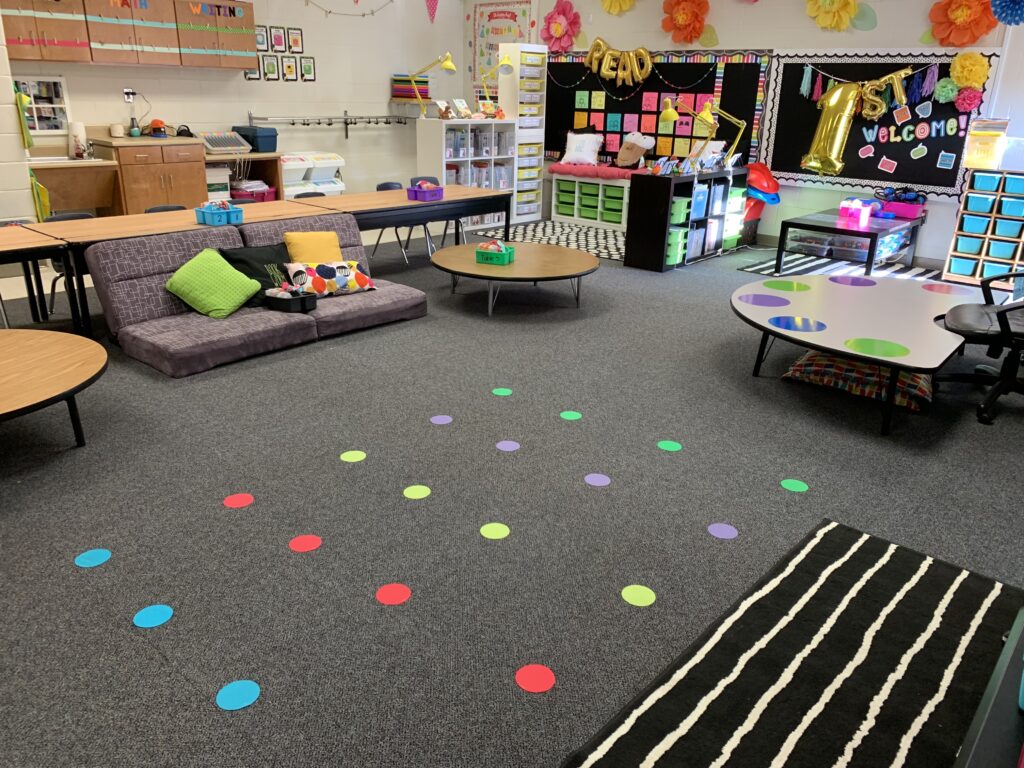
Seating/Whole Group Area
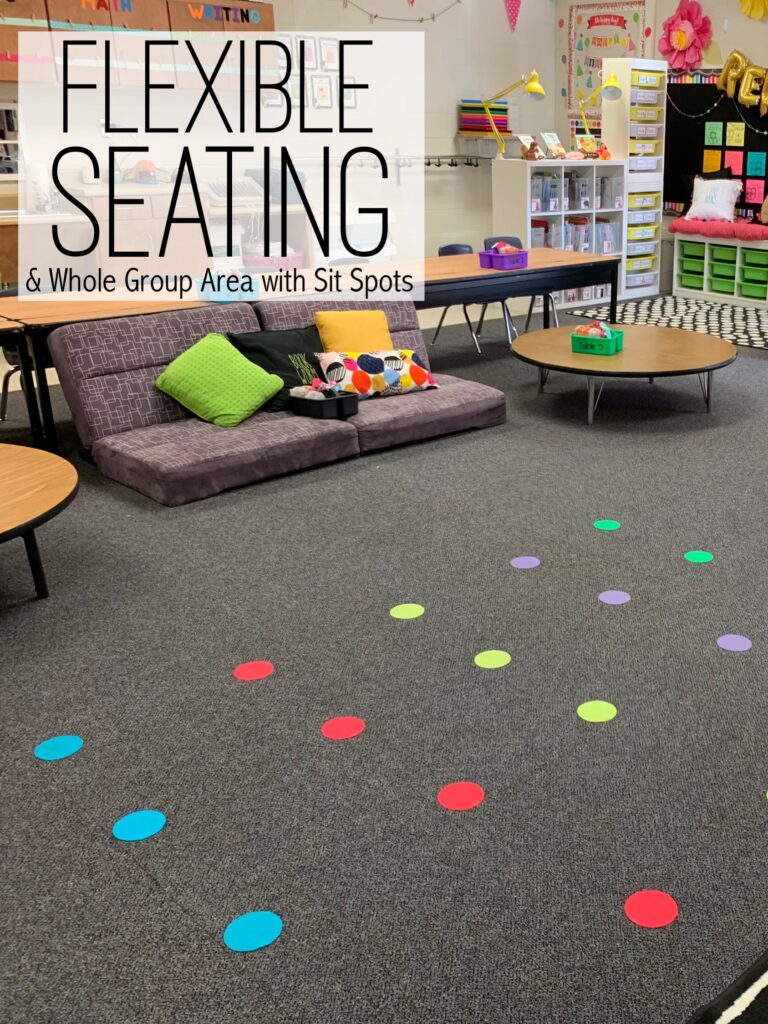
This is a view from where my interactive TV is located. You can see my Sit Spots where students come for our whole group lessons and the flexible seating options. I anticipate having around 20 students. I have enough seating options for around 30 students. One thing I love about flexible seating is that it separates students all over the room and spreads them out. They aren’t all in a clutter where they just want to chat about their breakfast or what their mom fixed them for snack. They tend to only have a couple of students around them.
Word Walls
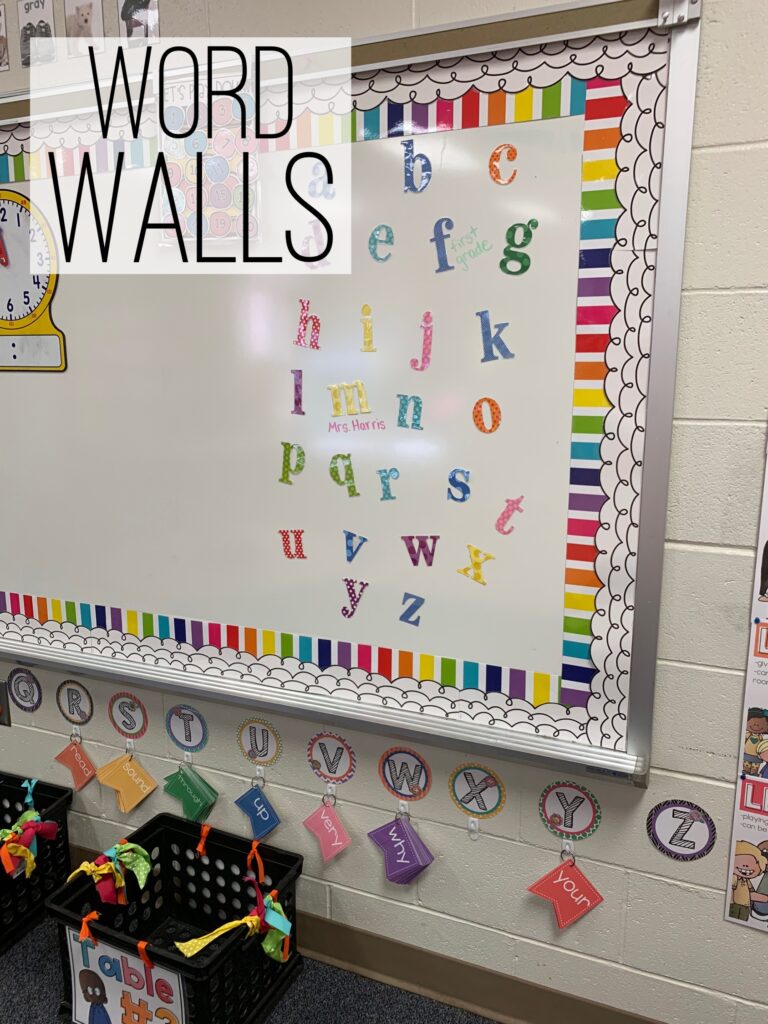
This area is so important for Writers Workshop. My students each have individual word walls in their writers notebooks, but I also have additional sight words on rings below my board. This saves room and allows students to come and get what they need. For students who are working on their writing stamina, just getting up to grab a ring can be enough of a break for them to clear their heads and get back to work immediately. This year, I added an additional word wall for words that students want for their writing that they won’t find as a sight word. I plan on writing words here that relate to Social Studies, Math and Science content, as well as words that follow phonics patterns that students haven’t been taught yet. While I won’t give them every word so that I can see what they can produce independently, we all know that if they can’t read their own writing, they will become frustrated and start a new writing or just draw and color through workshop. I’m going to eliminate this with the word wall on my white board.
That’s it! Nothing else has changed from last year. I strongly believe in working smarter and not harder. If something is working for your room, don’t change it to keep up with different trends. Just work on the areas that can help you be a better educator than you were last year. What can help make your students even more successful? Work on those areas and leave the rest! If you are interested in recreating some of the areas I have in my room you can head over to my Amazon list to see what items I would recommend. Click here to see more.
If you wish to watch the “Grand Reveal” from a video I recorded, click to watch below!
13 Comments
Thanks for sharing. Your room looks amazing!
Thank you so much
Great class! Where can you buy the whiteboard circles on your reading table?
I cut them from regular stick vinyl from michaels with my cameo silhouette
What are and where did you get the grey cushions at the back of your carpet area? Also love your teacher dead organization!
Where did you get the colored drawers that are off the left of your reading table and the ones on the right as well?
Michaels!
Lovely room! I am wondering about your “sit circles’. What are they made of, where did you get them, and how are they stuck to the floor. Thanks!
Lara
yeet
Pearl has a big head and newton is the greatest of all time and here is a link to my dad.
https://giphy.com/gifs/dance-lol-trump-2uI8XF2T6UT4vaFVEM
Can you link the coffee table?
I watched your video and wanted to know where I could find the stickers (labels) you used on your books to help children return the book to the right place and to find the book level of their book. Thanks for sharing all your great ideas!
I’m interested as well.
Comments are closed.