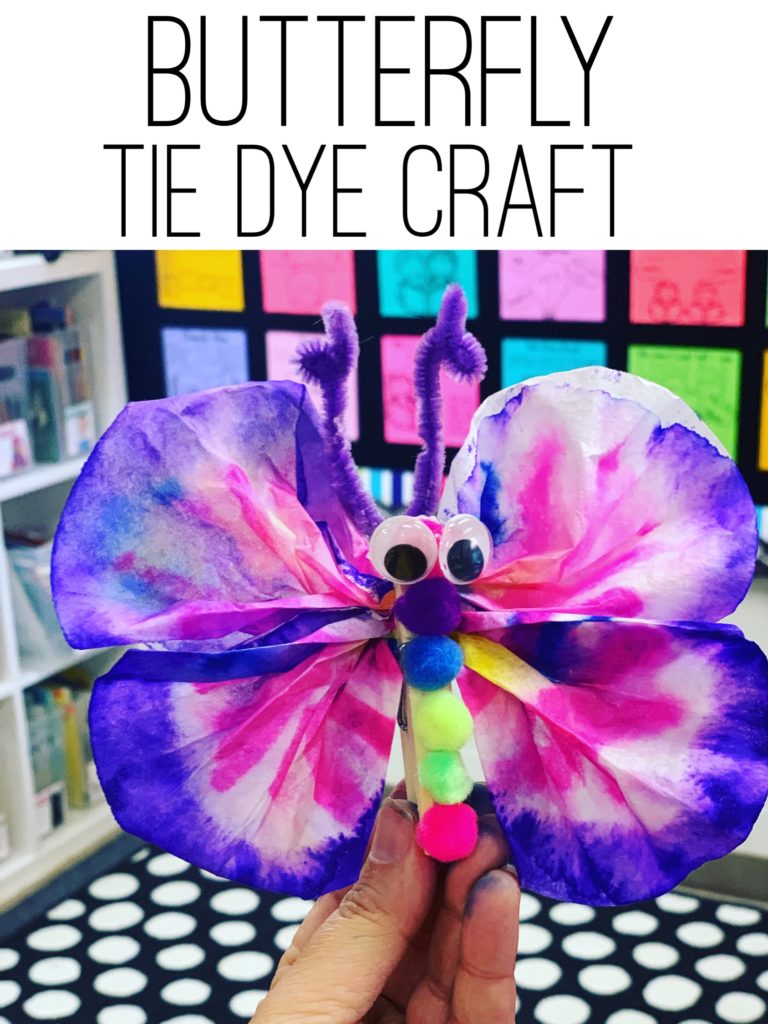
Happy Spring! We kicked off our first craft club day of spring with these fun Tie Dye Butterflies! The kids had a blast, and I must admit that they turned out way cuter than I imagined.
What are clubs?
Want more information on clubs? The last Thursday of every month, we spend 40 minutes prior to dismissal with students that are not in our homeroom. First and second graders pick a club of their interest to join, and we build relationships with the students and share our passions with them. Our entire school participates, and I love it!
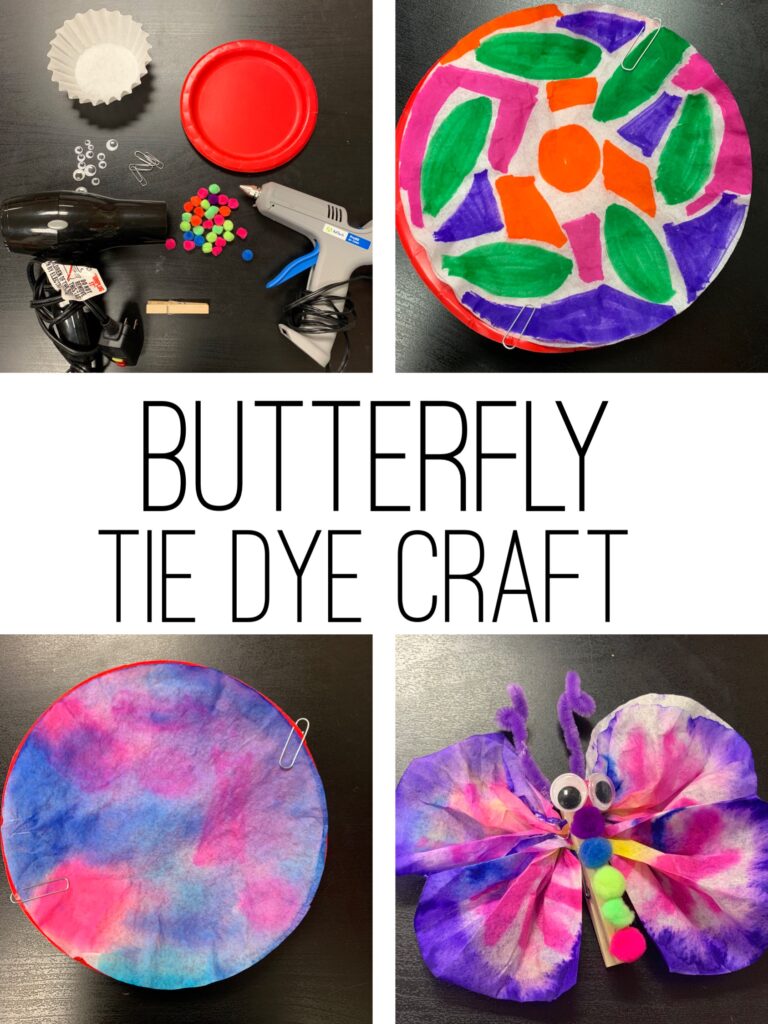
Materials
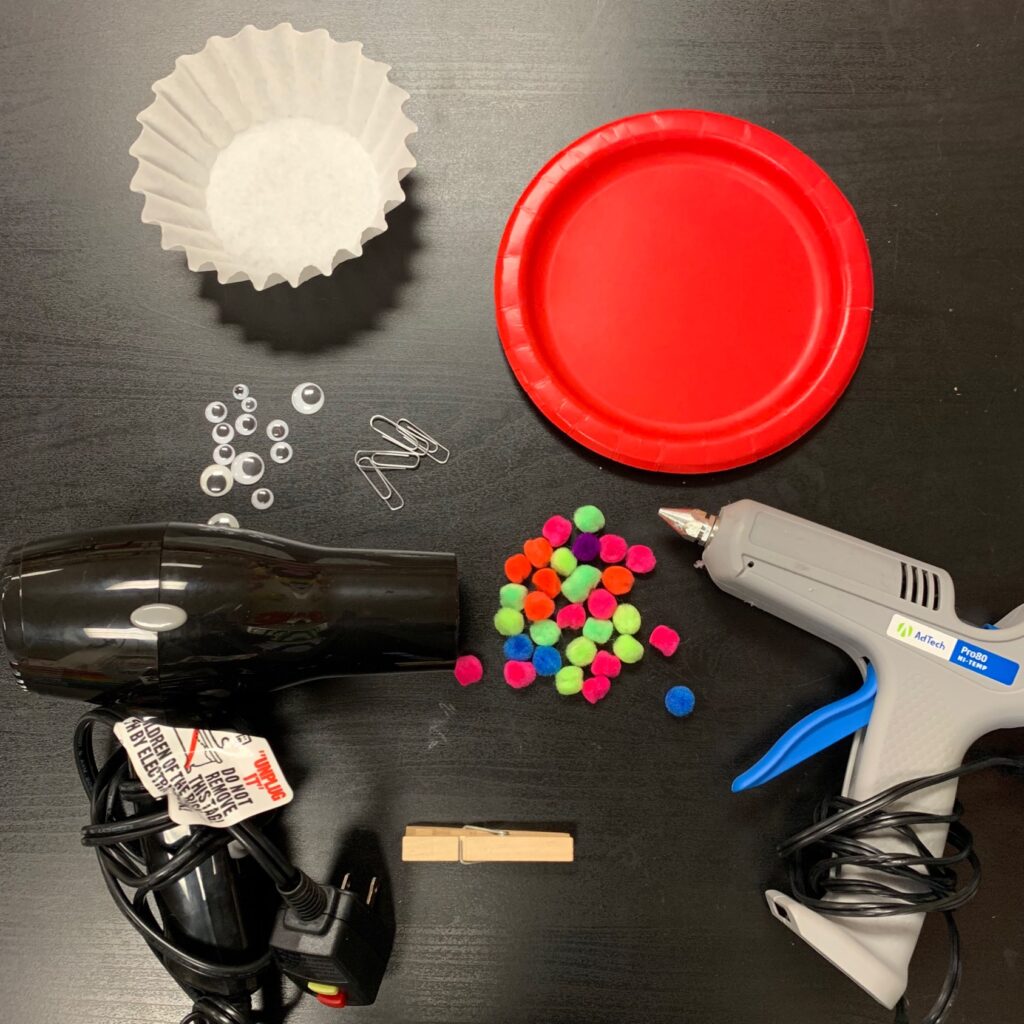
- Mr. Sketch markers or washable markers of your choice
- Two Coffee Filters per student
- Hot Glue Gun
- PomPoms
- Clothes Pins
- Pipe Cleaners
- Eyes
- Hair Dryer
- Paperclips
- Cake Sized Plates
- teaspoons or eye droppers for water
Step 1: Color and Design
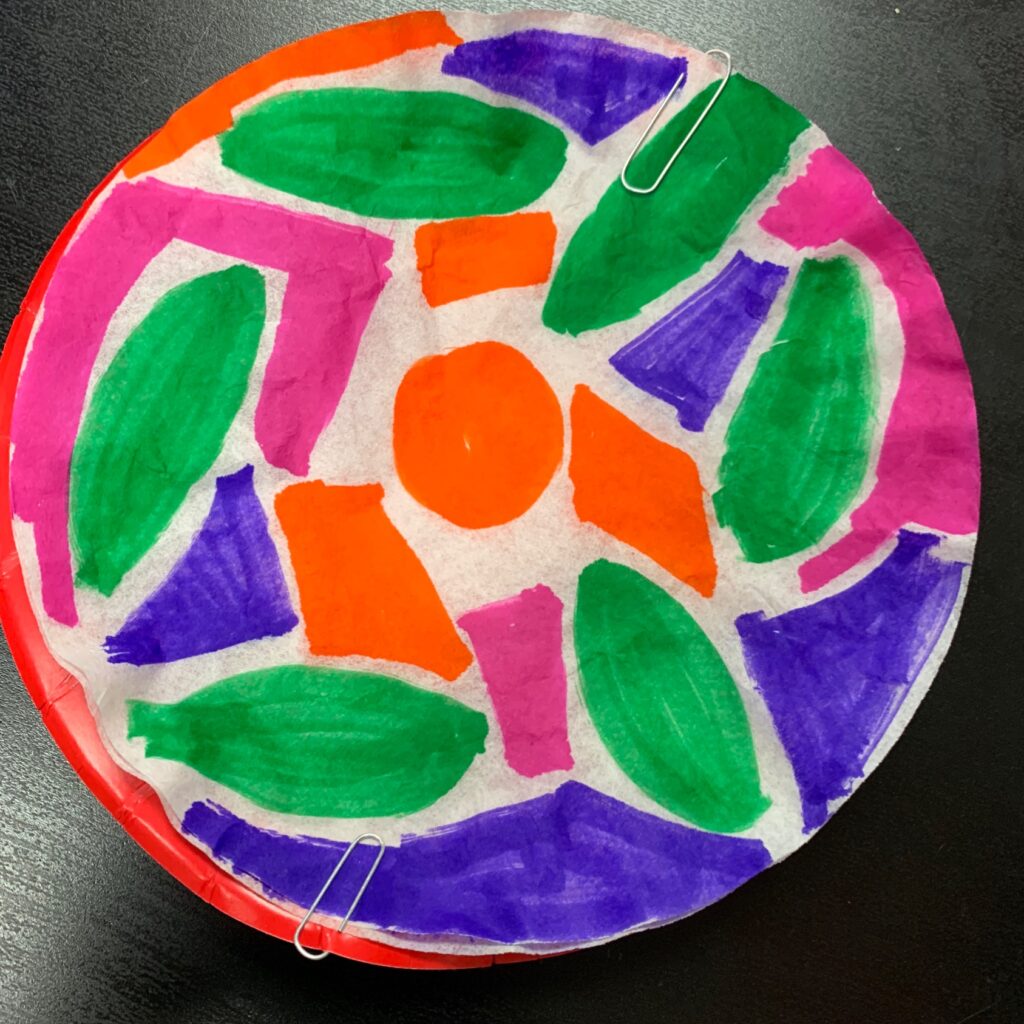
To keep the markers from getting all over my tables, I placed the coffee filters on cake plates and paper clipped them down. Students can then add marker designs on the filters. Be sure to leave a little white between the colors or else you might end up with a black or dark brown butterfly wing.
Step 2: Add Water and Dry
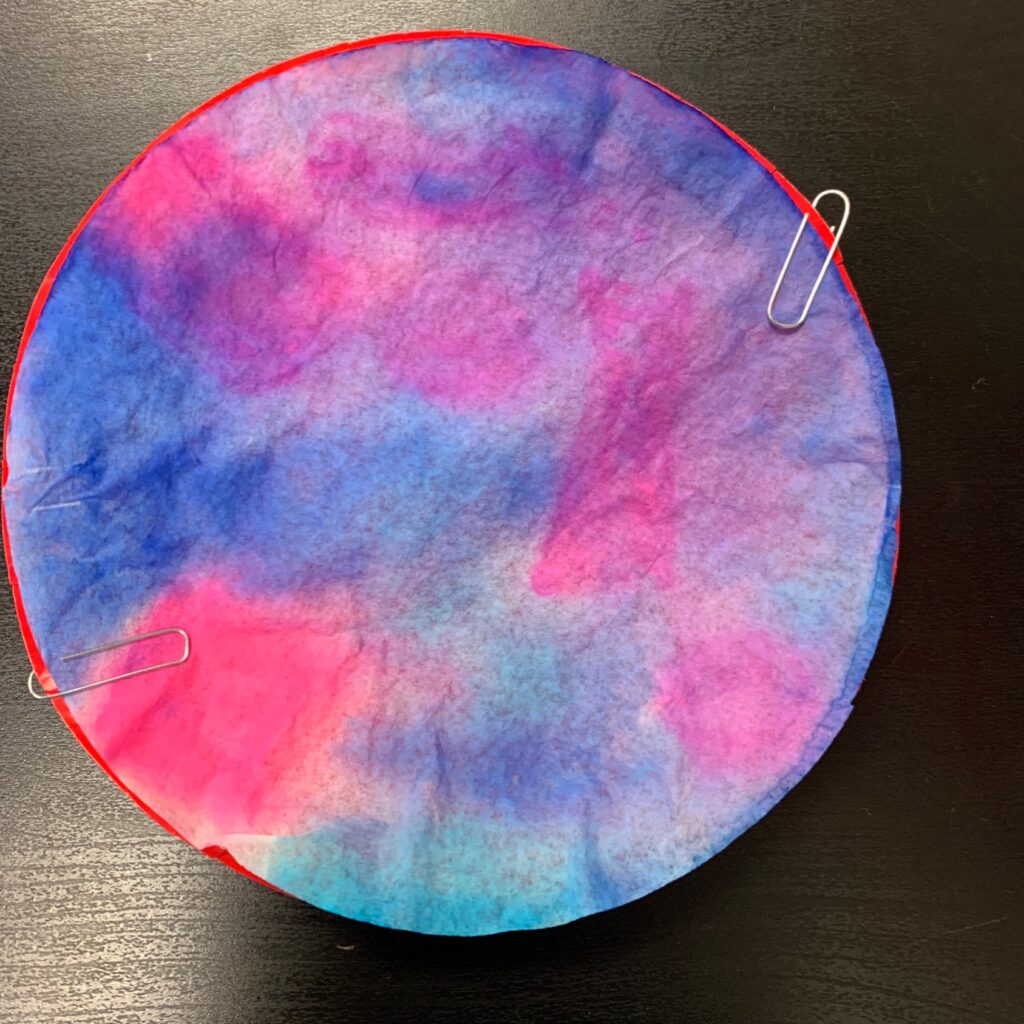
After everyone was finished designing their wings, we added small drops of water until the entire filter and marker creations were wet and running together. We used teaspoon measuring spoons. I have read other sites where they used eye droppers, but I didn’t have enough on hand for 20+ students.
I then had blow dryers set up around the classroom for them to dry their filters. If you had more time available, you can easily set these outside in the sun to dry. Since my club only meets once a month, I wanted them to be able to take them home.
***Be sure to go over safety with students. We kept our paperclips in place so that the filters didn’t fly around the room. Also, we discussed the importance of not touching the metal and making sure to move the blow dryer around and not leave it in one spot.***
Step 3: Arrange and Glue
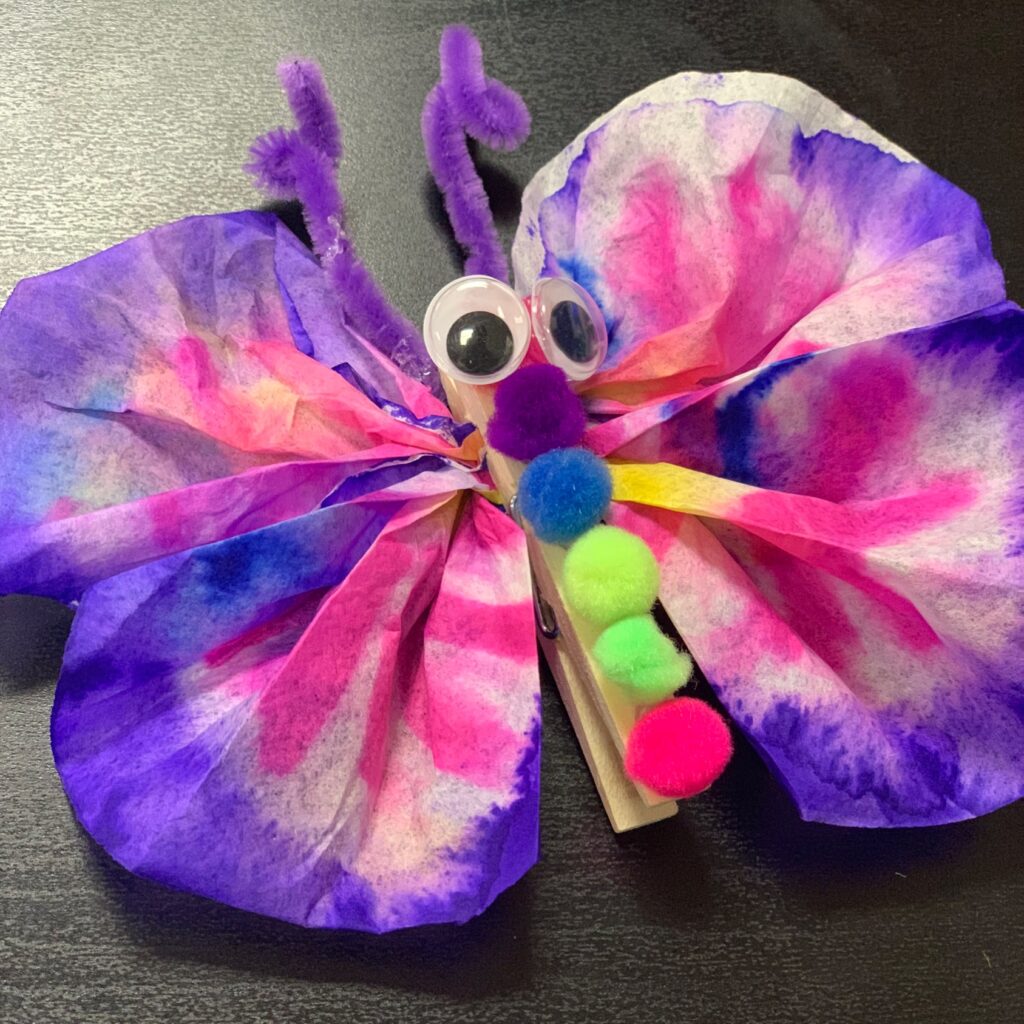
When the wings were completely dry, they separated the two layers and accordion folded them. I had a parent/grandparent volunteer at a table helping with this step. She helped them clothes pin their wings into place and then they were able to pick out their materials for the body, eyes, and antennas. I then glued all the pieces to complete their creations.
Tips and Suggestions
Next year, I will probably have everyone put their materials of choice in a ziplock bag with their names, and I will put them together after school. I was literally hot gluing butterflies through dismissal time. So, make sure you have an hour if you have 20+ students in your classroom, or plan for students to not take them home that day so you can glue them after school. One student asked if there was anyway for me to give her a magnet so she could put her butterfly on the refrigerator at her house. What a great idea! Next year, I will also add this to the list of materials! Overall, it was a fantastic craft that was colorful and fun. Even the boys were excited about this one! Yay!
